Updating Genesis
NOTE: This page is only for people who have already installed an existing version of Star Wars Genesis. If you have not installed Star Wars Genesis before, then this guide does not apply to you and you can simply get the latest version by following the normal guide.
Latest Supported Starfield Version: 1.15.222
Current Starfield Version: 1.15.222
Latest Genesis Version: 8.7.0

- Shattered Space
- Fresh Save or Non-Modified Genesis Save
- Wabbajack
- An 80 GB page file if you have not done so already.
Answers to Common Questions
- A new save is required for V7 -> V8. A new save is NOT required for 8.x to 8.x. However, that does not mean there won’t be any issues with existing saves. Please read up on the Existing Save Issue Documentation page so you are aware of any issues you may encounter, and how to possibly fix them.
- If you have a modified version of Genesis, please refer to the Modified Save Guide for more information, such as how to make sure your additional non-Genesis mods don’t get deleted during the update and ruin your existing save.

- [Optional] If you have updated Genesis repeatedly over the months or years, your Downloads folder may have accumulated a large number of old files. It is recommended to clean it periodically using this tool if you are low on disk space.
- Existing save users must NOT be in the Frontier/Echelon, Coruscant, Dantooine, or the Lodge. Go to some random moon, perform a manual save there, then update Genesis. Make sure you load into that save after.
- Close both the game and Mod Organizer and then update your Starfield (if there’s an update).
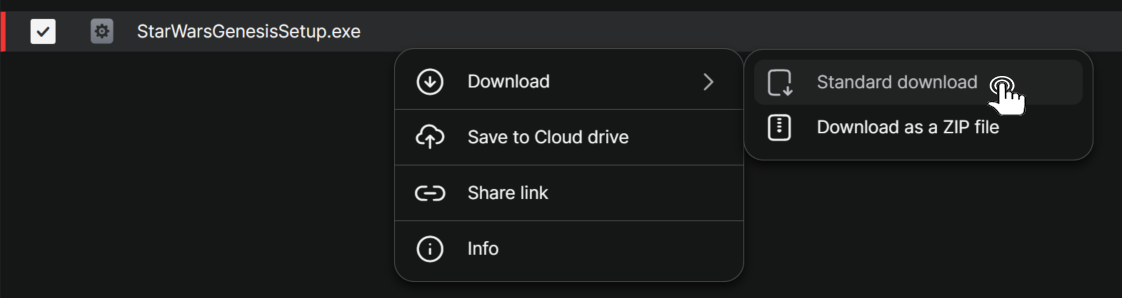
- Download StarWarsGenesisSetup.exe as a Standard Download (not zip) and run it. If it doesn’t work, try the mirror link. If neither work, try a different browser or turn off your VPN and any other security extension you may have installed.
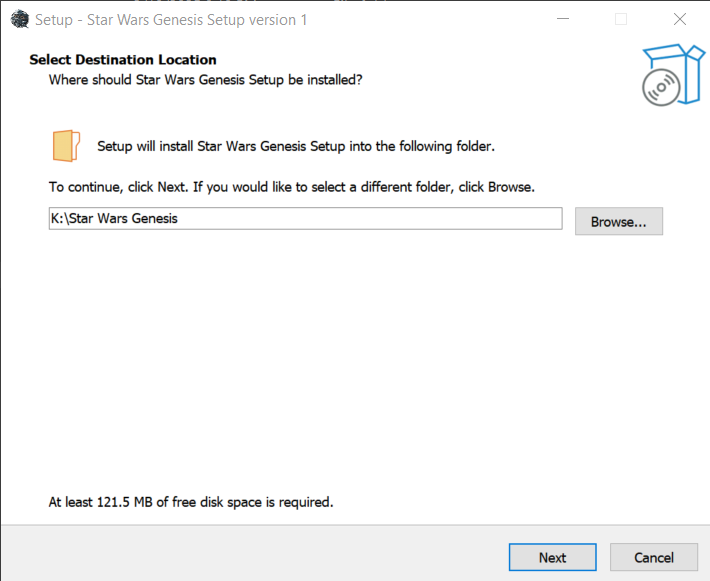
- The install location should stay Star Wars Genesis in your root drive. That is the same place you installed Genesis.
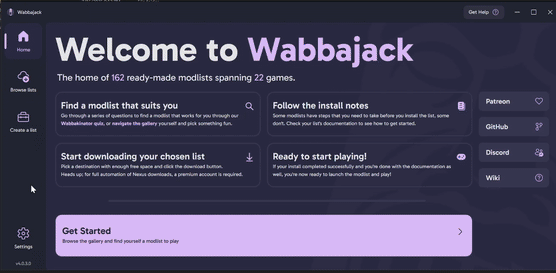
- Wabbajack will automatically open after the install. Click the gear icon (Settings) on the bottom left, then logon to Nexus Mods. Even if you’re already logged in, log out and log back in. Otherwise your mods will all fail to download.
- Click Browse Lists on the left side of Wabbajack, and then click Install From Disk at the top right. Navigate to the \Star Wars Genesis\Compiler folder and select Star Wars Genesis.wabbajack
- Match everything to this (remember the drive letter like K, C, etc should match yours, not mine):
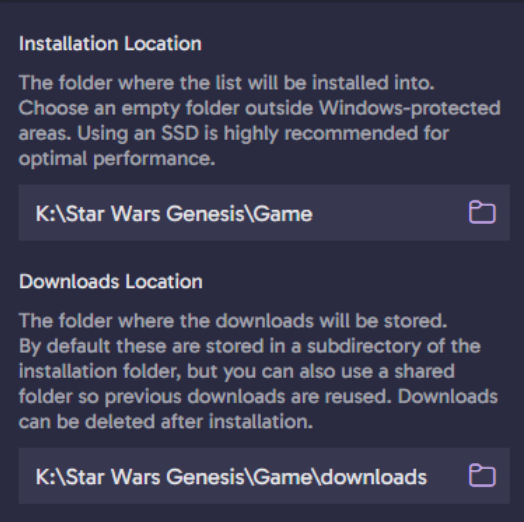
Note: It is a common mistake to set the installation location to just the \Star Wars Genesis folder and not the \Star Wars Genesis\Game folder. If you do that, you will get an error saying you can’t install to the same place as your Wabbajack compiler.
- Start the install and make sure it says Star Wars Genesis 8.7.0. If it says an older version, you ran an old compiler file by accident. Remember, you have to download and run the new .exe file in Step 3.
Note: If you get a download failed late into the install and you’re sure you’re logged into Nexus, just click retry. The Nexus servers have been terrible lately. For any other errors or issues, refer to the Wabbajack FAQ. There is a fix for literally every Wabbajack issue in there.
- After the install finishes, go to the \Star Wars Genesis\Game folder and run GENESIS_DOCUMENTS.bat. You will be asked a question that you will have to answer Y or N to.
- Launch ModOrganizer.exe from the \Star Wars Genesis\Game folder as per usual. If you get a popup asking about nxm links, click Yes.
- Keep in mind that you will have to re-enable some stuff if you are a controller or ultrawide monitor user, or kept your HD Overhual. Click the buttons below for the instructions.
Note: If you are having LAUNCH issues such as Starfield crashing on startup or weird popups, then please refer to this page

Your settings are automatically configured after installing. They are either set to medium or max depending on the choice you made running the GENESIS_DOCUMENTS.bat file. You are free to adjust the graphics settings as you wish regardless of your choice but please be aware of the recommended Genesis settings as messing with some stuff like Dynamic Resolution, Dialogue Camera, and Framegen can cause crashing and other issues.

Throughout updates, your Star Wars Genesis folder’s size may increase due to leftover downloaded files that aren’t in use anymore. Unfortunately, there’s not really a fix for this. For now, the only solution is just deleting the entire downloads folder every couple of updates. Just FYI it’s not an alarming increase of file size. For example, a Genesis install for 7.0 is 180 GB instead of 100 GB. That means going through 7.0 -> 7.2 -> 8.0 -> 8.1 -> 8.2 -> 8.3 -> 8.4 -> 8.5 resulted in 80 GB of leftover files.
You can delete the Downloads folder at any point and Genesis will work fine. The only thing that deleting the Downloads folder does is make it so you have to download every mod from Nexus again during a Genesis update, instead of only the mods that got updated. If you have Nexus Premium, then this isn’t really an issue. Tons of people in fact delete the Downloads folder for every modlist they have to save space. If you don’t have Nexus Premium however, that’s not really an option for you. In the future, I’ll consider writing a script that deletes all old downloads from the folder for you guys.

The default HP of new characters is 200. This is considered Normal Difficulty.
| Difficulty | Health Amount | Console Command to be Used (` key) |
| Gaming Journalist | 3000 | player.modav health 2800 |
| Story Mode | 1000 | player.modav health 800 |
| Beginner | 400 | player.modav health 200 |
| Casual | 300 | player.modav health 100 |
| Normal | 200 | N/A |
| Hard | 150 | player.modav health -50 |
| Very Hard | 100 | player.modav health -100 |
| Extreme | 50 | player.modav health -150 |

I highly advise you to make a copy of your entire Starfield folder at \SteamLibrary\steamapps\common\Starfield and store it someplace safe. This is a precaution for if you accidently update your game. All you would do is just delete everything in the actual Starfield folder and then copy these stored Starfield files into there. Bam. You now have downgraded back to the correct version and saved yourself a headache.
